
Everything You Need to Know About the Kodiak 100/900 Single Point Refueling System
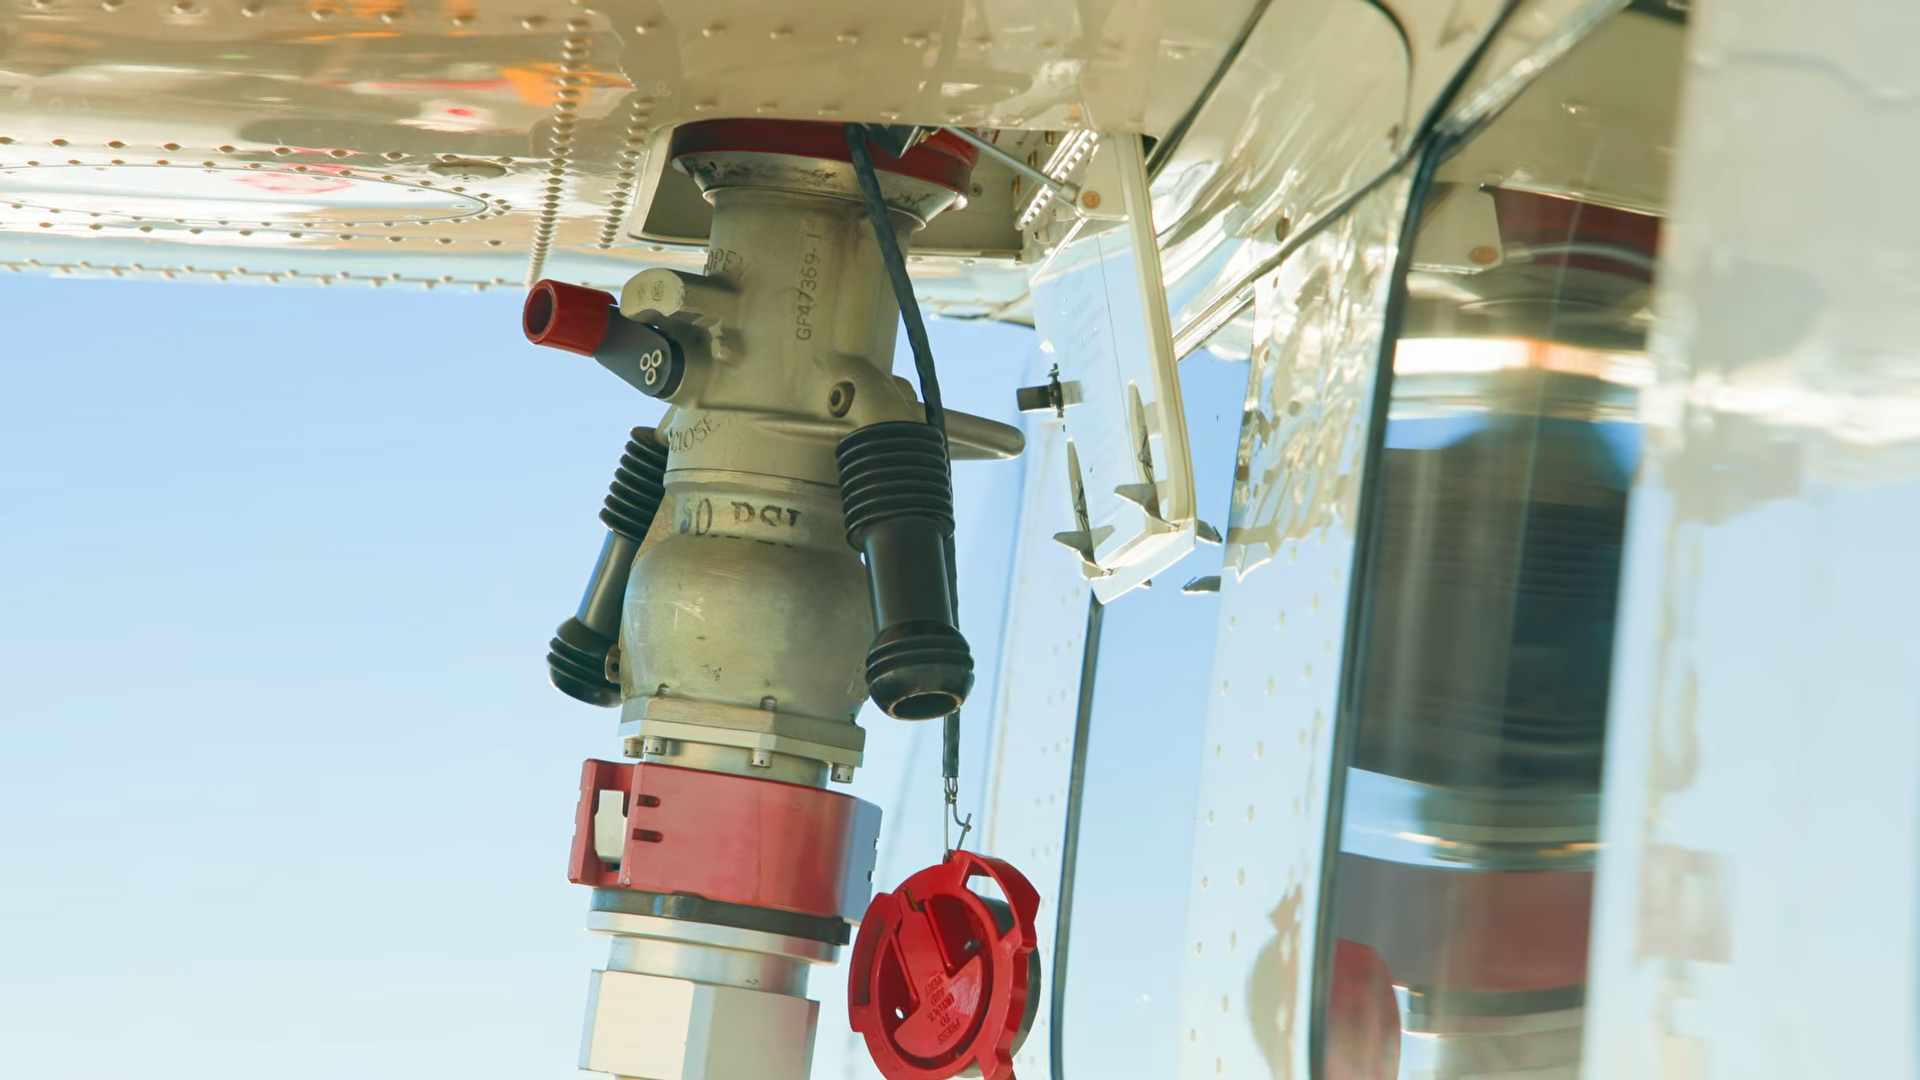
If you've ever had to climb a 10 or 12-foot ladder to fuel a floatplane over-wing, you already understand why the single point refueling system is such a game-changer. Today we're breaking down everything you need to know — how it works, how to use it, and the one mistake that will kill your battery if you're not paying attention.
Two STCs, One Worth Knowing
There are actually two STCs for single point refueling on the Kodiak 100. The older one, certified around 2011, places the connection point near the back door. You'll still see it on some older airframes, but it's largely been replaced by the newer system — so that's not what we're covering here.
The system we're focused on was certified in 2018 by a group called AO Aviation. It lives under the pilot-side wing, between rib one and the wing root, and it's become the standard on all new Kodiak 900s. It's also available as a factory option on Kodiak 100s — meaning if you're looking at a 2023 or newer, it's almost certainly already on the airplane. And as you can see on this floatplane, it's also a very popular retrofit.
The Install: Clean, Light, and Smart
One of the best things about this system is how well it integrates into the airframe. It's tucked neatly under the wing with a flush door covering it, and the entire retrofit system weighs less than 20 lbs. You'd barely know it was there.
To open the door, you'll find three latches. A word of experience here: if you just pop them open, the door will swing back hard and chip your paint. The right technique is to push the latch open with your index finger while your thumb catches the door — do that on all three, and the hydraulics will lower it smoothly into position.
One thing to watch: the door should not contact the window or the fuselage. If it does, the hydraulic strut needs adjustment. When properly set up, it stops clear of the window with just enough tension to hold it in place.
What's Under the Door
Once you're in, here's what you're working with:
The fuel connection sits on the left side and is attached by a leash to keep it from getting away from you. Fair warning — a lot of operators remove that leash because it can swing around and scratch the window. If yours still has the leash, just be deliberate when connecting. Better yet, get the window cover. It's cheap insurance against scratched plexiglass from an accidental swing by ground crew.
The fuel gauges for both left and right wings are visible right here under the panel. This is critical: unlike jet-style single point systems, this one does not automatically meter fuel. You cannot dial in a target fuel load and walk away. Someone — pilot, line staff, anyone — needs to actively monitor both gauges throughout the fueling process to make sure each wing is receiving fuel evenly.
The maximum allowable wing fuel imbalance in the Kodiak is 250 lbs. Since you're fueling from the left-side connection, the left wing can fill faster than the right. Let that go unnoticed and you've got an imbalance problem to sort out before you can fly. Don't let that happen.
The control panel has three switches. Left valve, right valve, and a center power switch. The center switch has three positions: middle is off, up is system on, and down is a quick-reference function that lets you check current fuel levels without initiating a full fueling cycle.
The 9-Step Fueling Checklist
The good news is that the STC requires a nine-point checklist placard right on the panel. Even if you're not present for fueling, a competent line tech should be able to work through it. Here's how it goes:
Ground the airplane.
Attach the fuel nozzle to the single point connection.
Verify left and right valves are closed — both wing valves should be in the off position before fuel flows.
Start fuel flow on the truck at a maximum of 55 PSI. With valves closed and the system off, fuel should not enter the airplane. This is the system's self-check.
Select the SPR system to ON and initiate the pre-check. The left wing display comes on first, followed a few seconds later by the right — the system running its internal diagnostics.
Monitor the service pump totalizer — advance, stop, advance, stop. This confirms the system is operating correctly before the valves are opened.
Open the left and/or right valve and fuel to your desired level. Watch both displays. Keep it even.
Close both valves once target fuel level is reached.
Turn the system off. Switch off. Both red display lights out.
The One Thing That Goes Wrong
Step nine. Every time.
It's the most common failure point in the entire process, and it's not a mechanical issue — it's a human one. The fueler removes the nozzle, gets back on the truck, starts filling out paperwork, and forgets to turn the system off. You close the panel door, and now you have no idea the system is still running — because you can't see it.
Here's why that matters: the single point system runs on the hot bus, which means it draws power directly from the battery regardless of whether the master switch is on or off. It will stay on and drain your battery until it's dead. This isn't a hypothetical — it happens all the time.
My habit as a pilot: before closing up, I do a quick display reference to verify the fuel amounts look right, then I confirm the switch is off and both red display lights are dark. That two-second check has saved me more than once.
Bottom Line
The Kodiak single point system is one of those upgrades that makes floatplane and bush operations meaningfully easier and safer. No ladders. Clean install. Fast fueling. Just make sure you or your ground crew is monitoring those wing gauges, and never let anyone walk away without confirming that system is off.
Questions about the Kodiak 100 or 900? Drop them in the comments. And if you're buying or selling a single-engine turboprop, reach out to us here.
— Mark Brown, 11 Aviation