How to Start a Kodiak 900
Note: This article is for reference and educational purposes only. It is not an approved checklist or substitute for your Pilot's Operating Handbook (POH). Always follow the procedures outlined in your aircraft's current POH and any applicable AFM supplements. Consult a qualified flight instructor or Kodiak-authorized training provider before operating this aircraft.
The Kodiak 900 runs the PT6A-14A engine, and if you're transitioning from a Kodiak 100 or coming in fresh, there's one thing worth knowing up front: the 900 has a two-stage starting sequence that's a little different from what you might be used to. Get that detail right, and the rest is straightforward.
Here's the full start sequence, step by step.
Before You Touch the Starter
Get your cockpit set up first:
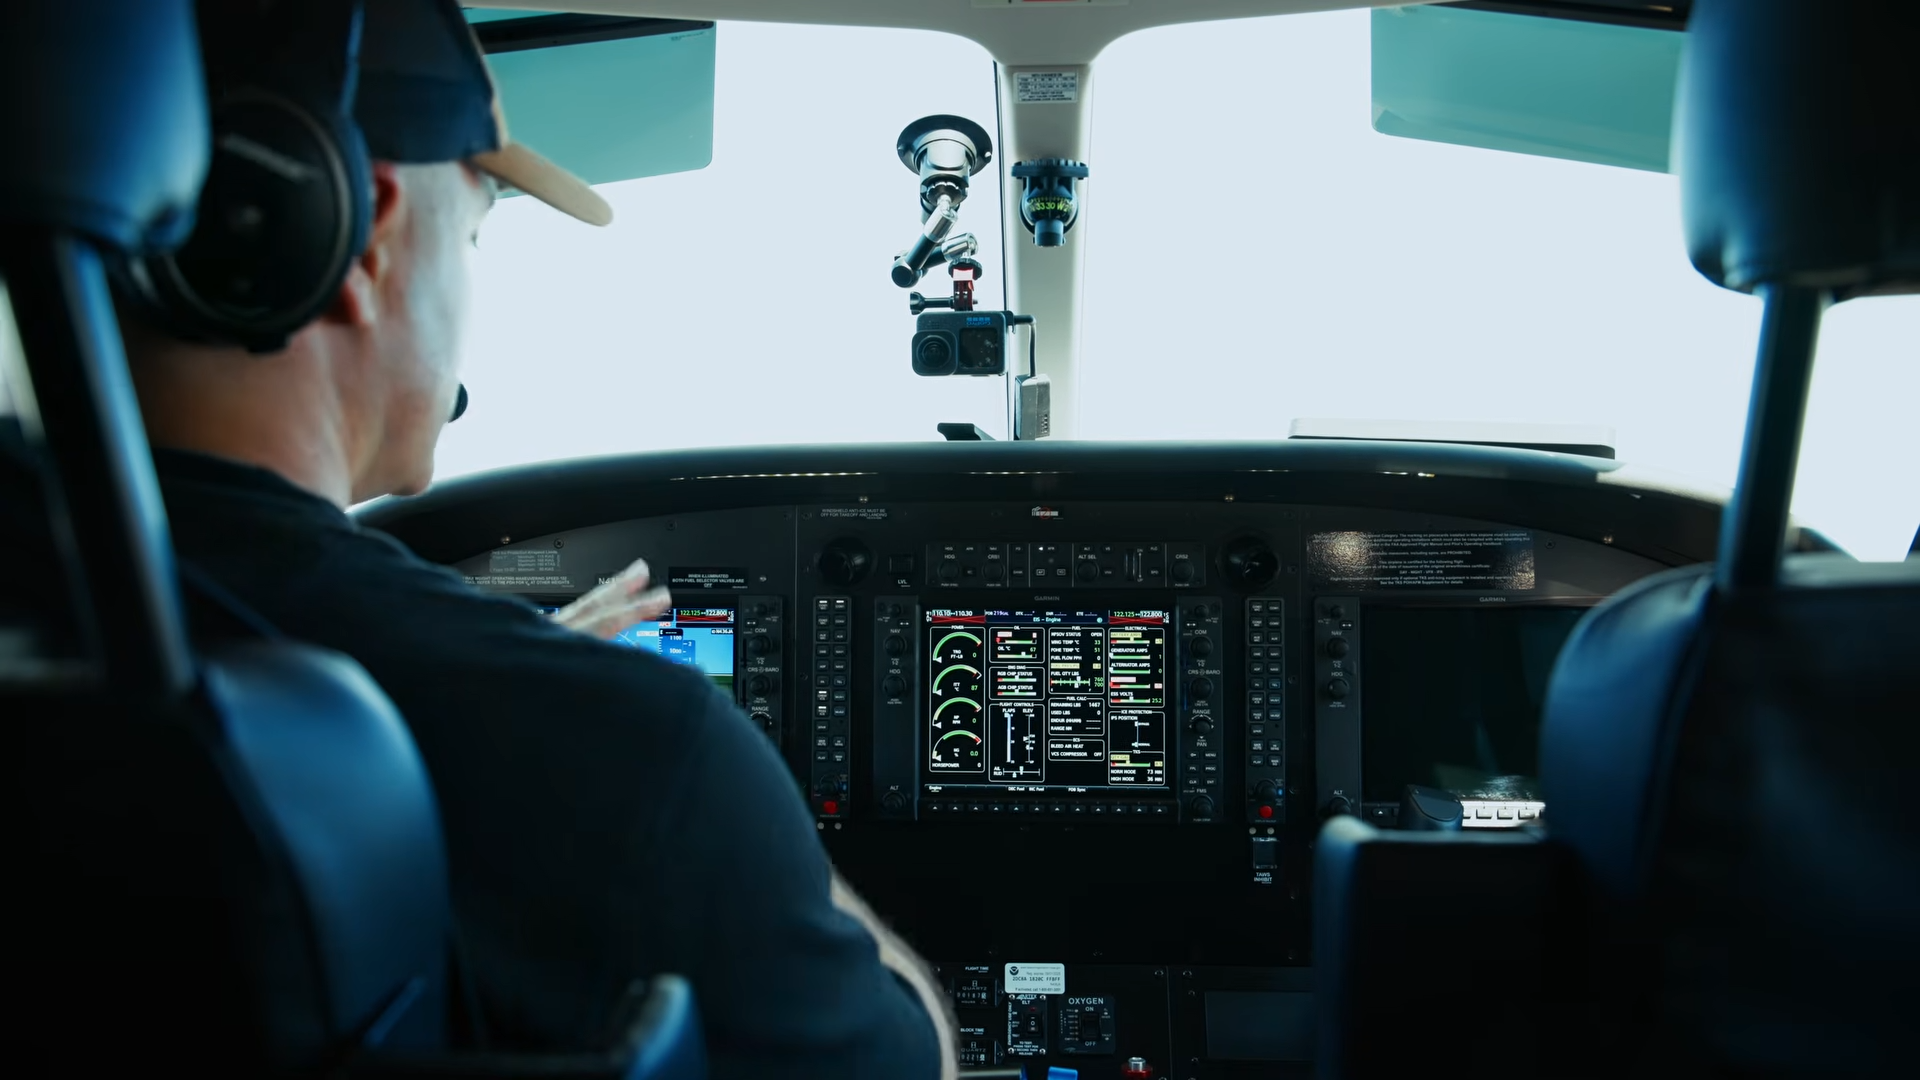
Battery master on — confirm PFD1 and MFD are lit and engine gauges are live
Fuel pump — move from standby up to fuel pump on
Confirm fuel pressure — you want to see it before you go anywhere near the starter
The Start Sequence
Here's where the 900 is distinct. This is a two-stage start, and the most important thing to know going in is this: hold the starter through the entire sequence. Don't let it go early.
Stage 1 — Starter engagement to fuel introduction:
Bring the starter switch up and watch your Ng (gas generator RPM) begin to rise. Keep holding the starter. Once Ng reaches 12% or higher, introduce fuel by bringing the condition lever to low idle. Continue holding the starter as the engine lights and stabilizes. Keep an eye on ITT — you want it to stay in the green.
Stage 2 — Holding through to self-sustaining:
Keep holding. The engine is still accelerating through what amounts to a secondary start phase. Once Ng reaches 62% or higher, the engine is self-sustaining and you can release the starter.
That's it. Engine running, everything green.
After-Start Flow
Once the engine is stable, work through your after-start items:
Fuel pump — back to standby
Generator switch — on
Alternator — on (this energizes the main buses, which are set to auto, and the auxiliary bus)
Prop — bring to max RPM
Flaps — set 20° for takeoff if you're getting ready to taxi
Air conditioning — on, if needed
That last item is worth calling out specifically. In the 900, you can run air conditioning on the ground without adding engine power — it doesn't require you to bump the torque to keep things stable the way some other installations do. If you're sitting in Texas in August like we were for this one, that's not a small thing.
A Note on Battery Amps
After start, you may notice battery amps reading a little high. Don't chase it. If you started without a GPU, the battery has been doing real work — running the avionics, the fuel pump, the starter — and it's going to pull charge from the generator until it's back up. It'll normalize as you taxi. As long as everything else is in the green, you're good to go.
The Short Version
1. Battery master on, confirm instruments
2. Fuel pump → on, confirm fuel pressure
3. Starter up — hold it
4. At 12% Ng → condition lever to low idle
5. Continue holding starter, monitor ITT
6. At 62% Ng → release starter
7. Fuel pump → standby
8. Generator and alternator on
9. Prop to max RPM, set flaps, AC if needed
The Garmin suite in the 900 makes monitoring easy — if it's green, you're good. But knowing the two key trigger points (12% for fuel introduction, 62% for starter release) is what separates a clean start from a hot start or a hung start. Know those numbers cold.
If you're interested in Kodiak-specific training — initial or recurrent — our team at 11 Aviation specializes in exactly that. Reach out at 11-aviation.co.
— Mark Brown, 11 Aviation