How to Start a Kodiak 100 Series 3
Note: This article is for reference and educational purposes only. It is not an approved checklist or substitute for your Pilot's Operating Handbook (POH). Always follow the procedures outlined in your aircraft's current POH and any applicable AFM supplements. Consult a qualified flight instructor or Kodiak-authorized training provider before operating this aircraft.
After 8,000 hours in Kodiaks over the last 12 years, the start sequence is second nature. But whether you're new to the airplane or just want a clean reference, here's exactly how I start a Kodiak 100 Series 3 — and why I do it the way I do.
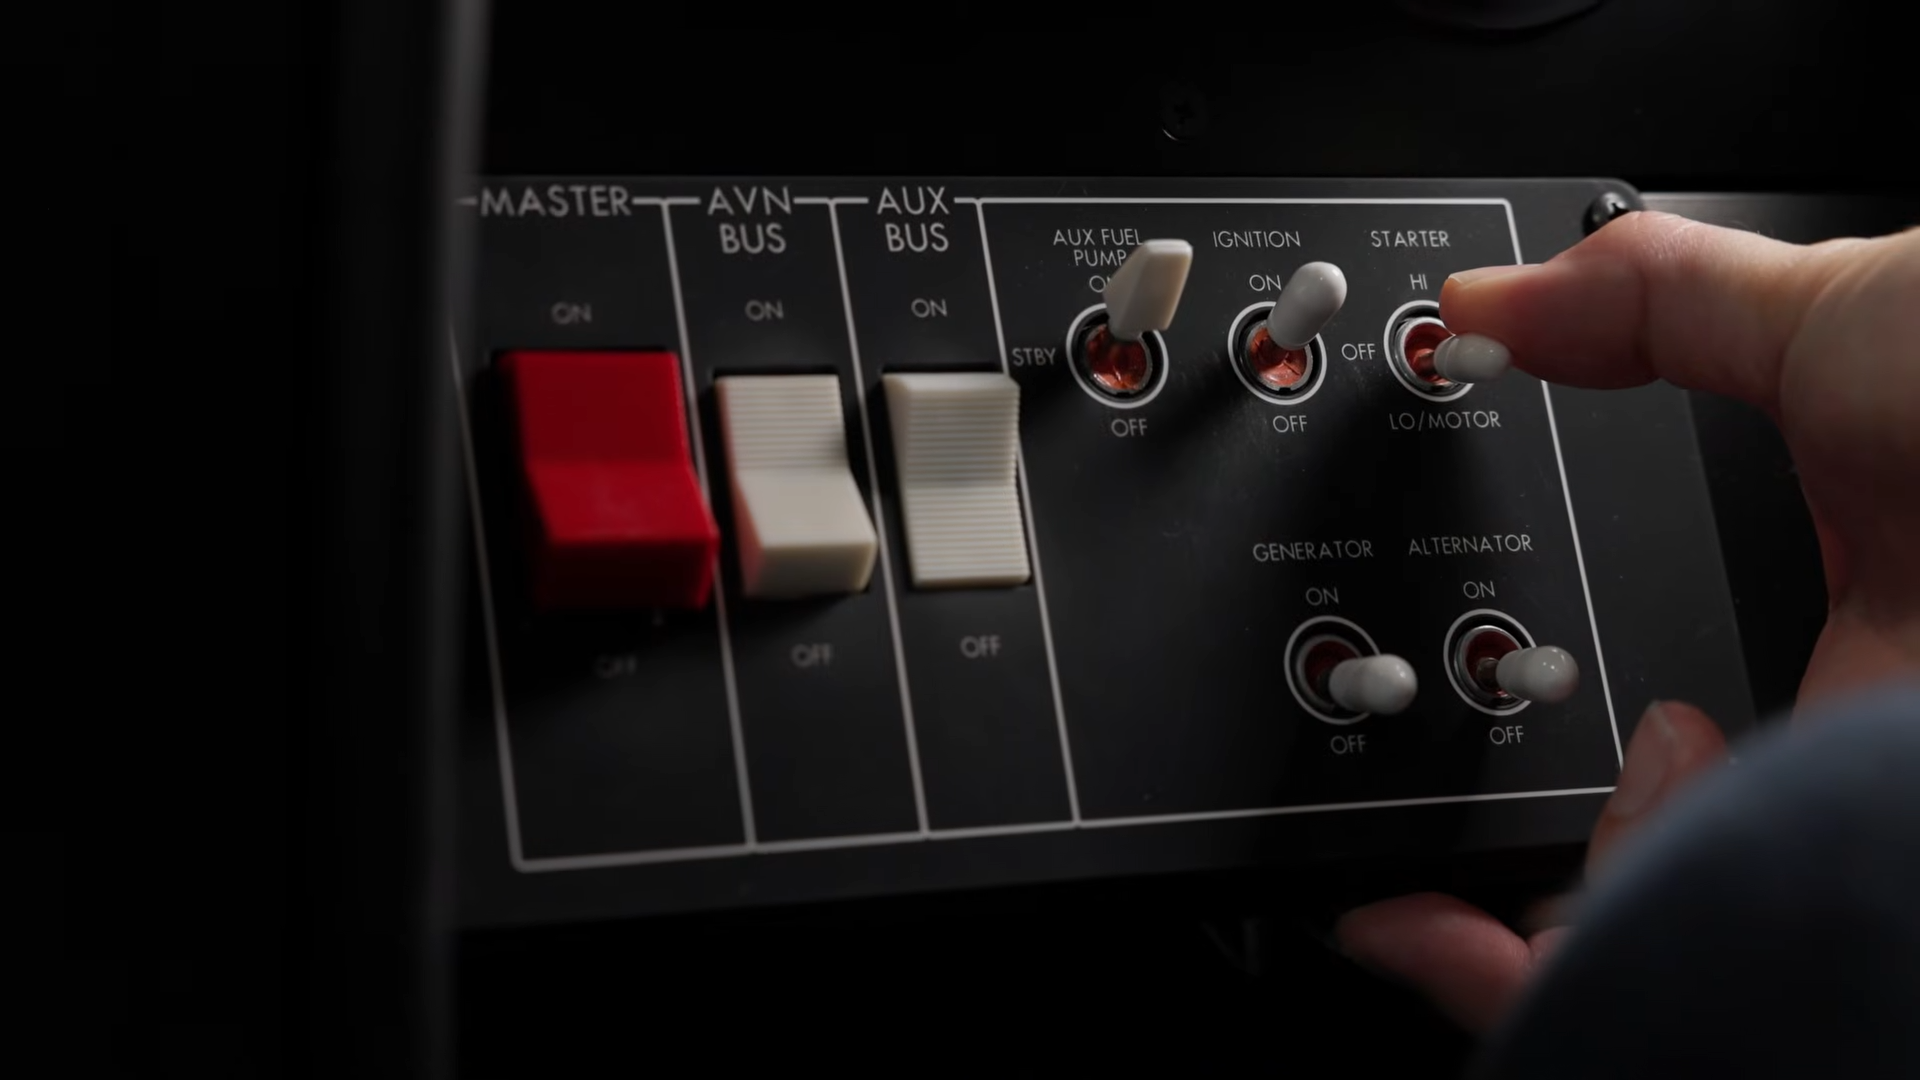
Step 1: Master and Avionics On
The first thing I do when I get in the cockpit is turn on the master and avionics bus. That brings up all three screens: PFD1, MFD, and PFD2.
You don't have to start it this way — you can run in reversionary mode off just the master and one PFD — but I prefer all three screens on, and here's why: the MFD has my trend data card, my engine gauges, and all my systems info. Starting with the MFD live means I'm capturing engine start trend data from the very beginning, which is just better practice from a maintenance monitoring standpoint.
The other benefit is readiness. With the avionics up, I can listen to ATIS over the speaker, get my comms configured, and have everything set before I touch the starter. By the time the engine is running, I'm already ready to taxi. The line staff doesn't have to wait on me.
Step 2: Pre-Start Checks
With the screens lit, I run through a quick scan:
Circuit breakers — confirm all in
Fuel selectors — both tanks on
Annunciators — three yellows are normal at this point: fuel pressure low, alternator fail, generator fail. The engine isn't running yet, so none of those are a concern.
Control levers — all aft: fuel condition at cutoff, prop in feather, throttle at idle, emergency power in the rear position
Step 3: Ignition and Fuel Pump
Over in the left-hand cluster where the starting gauges live:
Ignition on — it's faint, but you should be able to hear the igniter clicking
Fuel pump to standby — check the fuel page and confirm fuel pressure is up around 30 PSI
Fuel pump to on — pressure should hold; confirm it's still showing
Step 4: Starting Mode — Low vs. High
The Kodiak 100 has two start modes: low motor (down position, one battery) and high start (up position, both batteries together).
The high start was added before certification as a solution for quick-turn hot starts — the logic being that a faster, cooler start would help when restarting a warm engine. And it does work that way. But it's genuinely hard on the batteries, and I don't recommend using it routinely. In practice, about 99% of my starts are on low motor, and that's what I'd recommend for normal operations.
Step 5: The Start Sequence
Starter to low motor — hold it, and watch Ng rise. Once Ng reaches 14% or higher, introduce fuel by bringing the condition lever to low idle.
From there, monitor two things:
ITT — stays in the green
Ng percentage — once it reaches 52% or higher, the engine is self-sustaining and you can release the starter
That's it. Engine running.
Step 6: After-Start Flow
Once the engine is stable and everything's green:
Release the starter switch — it's spring-loaded, so you've been holding it the whole time
Ignition off
Fuel pump to standby
Auxiliary bus on — this brings your environmentals online
Generator on — check generator amps in the green
Alternator on — check alternator amps in the green (generator on top, alternator on bottom)
Prop out of feather
Flaps to 20° for takeoff
Ready to Go — No Warmup Needed
One thing worth understanding about the Kodiak: once that engine is started, everything is green, and the prop and flaps are set — you're ready to go. There's no warmup period required, no run-up needed in normal operations. The design philosophy is that the airplane should be ready to move the moment it's started.
That matters on floats, on short strips, or any time you need to be moving quickly. Set the prop forward, get the flaps in, and you're taxiing.
The Full Start Sequence at a Glance
Master and avionics on — all three screens lit
Circuit breakers in, fuel selectors on, levers all aft
Ignition on, fuel pump to standby, confirm ~30 PSI
Fuel pump to on, confirm pressure holds
Starter to low motor — hold
At 14% Ng → condition lever to low idle
Monitor ITT and Ng — keep in green
At 52% Ng → release starter
Ignition off, fuel pump to standby
Aux bus on, generator on, alternator on — check amps
Prop out of feather, flaps to 20°
For more Kodiak training content or if you're interested in buying, selling, or managing a single-engine turboprop, reach out to us at 11-aviation.co.
— Mark Brown, 11 Aviation